
Welcome at Shiftbase! Great that you started an account.
The question now is, where to start?
In this article you will find the basics to set up your Premium account.
Contents
Step 1: Creating locations and departments
Step 2: Adding teams and shifts
Step 3: Schedule and timesheet settings
Step 5: Setting up permissions
Step 1: Creating locations and departments
Depending on the size and structure of the company, locations and departments can be created.
An overview of the structure can be found here.
The management of this is found under: Settings > Organization.
Step 2: Adding teams and shifts
Once the locations and departments are added you can divide these departments into teams. This allows for more clarity in the schedule.
The first team is already added with every department by default. These are named after the department. Ofcourse you can edit these names.
Managing the teams can be done via: Settings > Organization or via Schedule > Shifts/Teams.
How to add and edit teams can be found here.
You can also create standard shifts using the method mentioned above. Here you can create all fixed shifts that exist in your company. These shifts are not only needed for the schedule. They are also needed when clocking in the working hours.
There is a standard day shift. You can also manage this via:
Schedule > Shifts/Teams
You can find the process of creating shifts here.
Step 3: Schedule and timesheet settings
It is now possible to create schedules and register worked hours.
You can set up the settings for the schedule and timesheets as required.
Here are a few examples of the schedule settings:
Here are a few examples of the timesheet settings:
- Punch clock management
- Clock restrictions based on GPS or IP-address
- Custom fields
Feel free to contact us if you have any questions.
Step 4: Checking contract types
There are two default contract types:
-
Zero hours
-
Fixed hours
The contract types determine the option for plus-minus hours or to add a standard surcharge card and absence policy.
The settings can be found through Settings > Employees > Contract types.

Click here for more information about editing and adding contract types
Step 5: Setting up permissions
Default user group for new employees is Employee. By default there are four user groups that you can choose from. The permission groups can be found under: Settings > Security. By default, there are 4 permission groups:
-
Employee
-
Planner
-
Manager
-
Administrator
The permissions are pre-defined. Therefore, it is not necessary to define the permissions, but I do advise to check the different permissions and adjust them if necessary. A new group can be added as well.
For more information on permissions, click here.
For more information on applying permissions to employees, click here.
Step 6: Adding an employee
To add a new employee, go to the main menu (blue tab) and click on Employees. Click on the blue button + Add employee in the top right-hand corner and a modal will open where you can enter the employee's details.
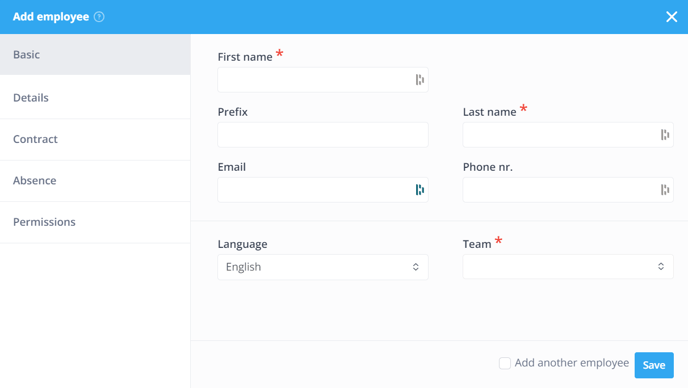
![]() Warning: When creating a new employee, it is essential to enter a first name and last name. If you want to grant the employee access to his/her overview, do not forget to enter his/her e-mail address. You should also enter the type of contract. The working hours per week should also be entered correctly for each employee under Contract. If the working hours and weekdays change, then either enter the total number of hours on one day (e.g. Sunday 40 hours), or divide the hours over all weekdays.
Warning: When creating a new employee, it is essential to enter a first name and last name. If you want to grant the employee access to his/her overview, do not forget to enter his/her e-mail address. You should also enter the type of contract. The working hours per week should also be entered correctly for each employee under Contract. If the working hours and weekdays change, then either enter the total number of hours on one day (e.g. Sunday 40 hours), or divide the hours over all weekdays.
More information on adding and changing employees.
It is also possible to import employee data via a CSV file. For more information on importing with a CSV file click here.
Next it's possible to create the schedules and add the timesheets. Please contact us if you have more questions about setting up the account.
