By default, Shiftbase has one location and one department. If your account has many employees, we recommend using multiple departments to keep a better overview.
The advantage of additional departments is that each department has its own employees and settings. This clarifies the schedule and timesheets, as not all employees are shown in one overview. In this article, we will give you an overview, give some examples and find out how to set up your hierarchy.
Contents
Switching Between Locations & Departments
Overview
Shiftbase works with three organisation levels so you can mirror how your actual business is structured. In short, the Location serves as your main segmentation. Run reports based on locations and set permissions quickly and clearly.
On Department level is where most functionality is introduced. The labour of your employees can differ vastly per department. That's why you can make department variations in the settings such as for Permissions, Availability, Break rules and more.
To segment your employees within a department, you use Teams. Employees within a department can freely be scheduled between teams and view each others schedule.
We will give some examples below.
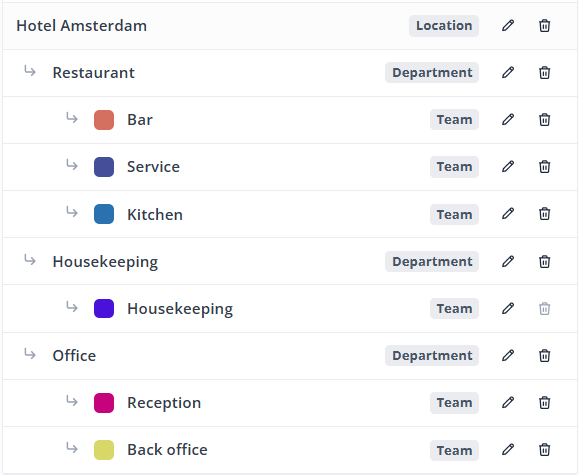
Example Hotel
This is a typical example, the departments are used to segment the different places within the location.
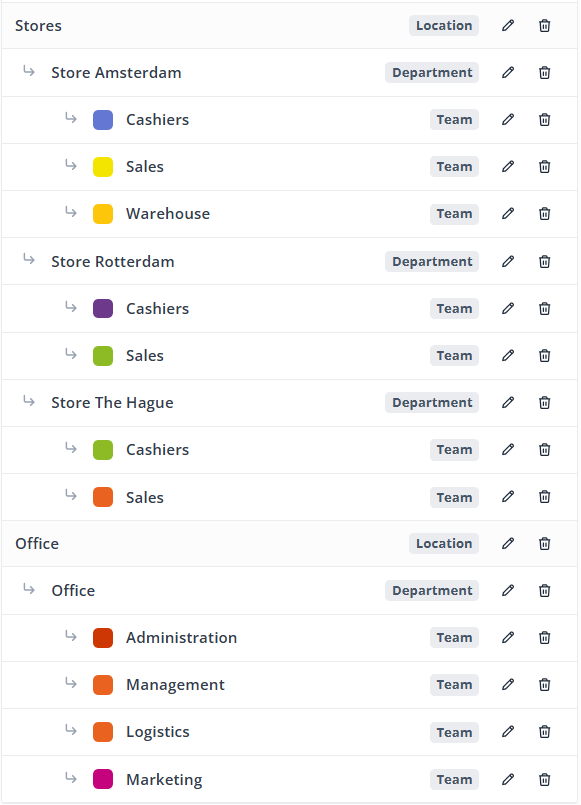
Example Retail
In this example, the departments are used as physical locations. The Location level is used to clearly segment the type of work.
💡 Tip: The Location level does not need to be a physical location.
Adding and editing an organisation level
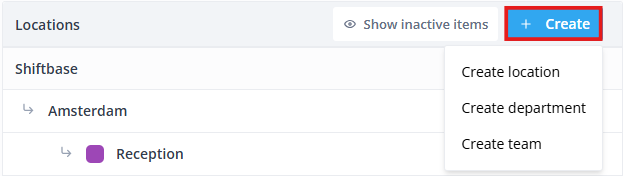
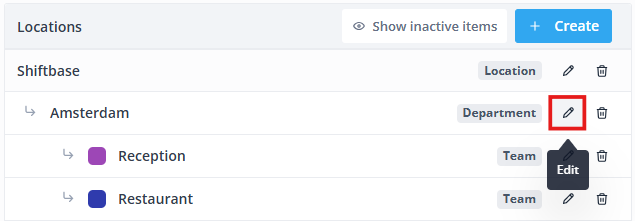
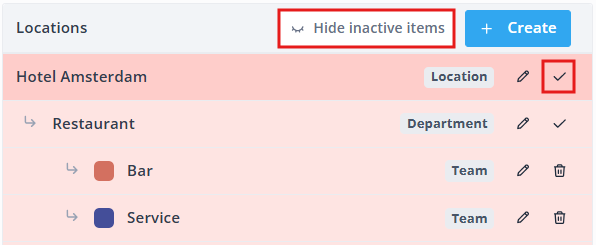
Adding an organisation level can be done via Settings > Organization. This will give you an overview of all Shiftbase locations and departments. To add a new location, department or team, click on the + Create button and select the desired organisation level.
An existing organisation level be changed by clicking on the pencil behind the name of a location, department, or team.
Locations
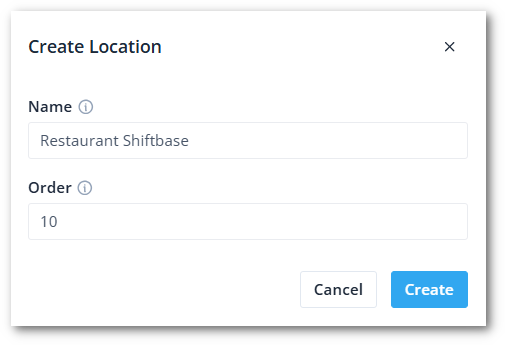
Locations are used as a main divider and serve to create the broad segments. When creating or editing a location, you can set the following options.
- Name: Name of the location
- Order: The order of this location showing up in the list here in the settings and in the filters in the Schedule, Timesheet and Insights. The lowest number shows first.
Departments
Departments are used to create segmentation and variation to settings. Also, the management and approval of absences are done on department level. The variations you can make are listed below.
- Shifts
- Permissions
- Availability
- Clocking rules
- Break rules
- Insights & Targets
- Schedule Publishing
- Notifications
💡 Tip: Think of departments as individual islands with their own set of rules.
When creating or editing a department, you can set the following options.
- Name: The name of the department
- Order: The order of this department showing up in the list of departments here in the settings and in the filters in the Schedule, Timesheet and Insights. The lowest number shows first.
- Location: Select to which location this department belongs to.
- Public Holiday Group: Select which Public Holiday Group is relevant for this department.
- Address: If you add the address to your department, you can use the weather forecast in the Schedule and Insights.

📝 Note: If you are using a payroll integration, make sure to connect and/or edit your mapping to the new departments.
Teams
Multiple teams can be created under a department. By default, employees can freely be scheduled in different teams in the same department. Use Flex pool teams (Premium) if you wish to schedule an employee in another department.
-
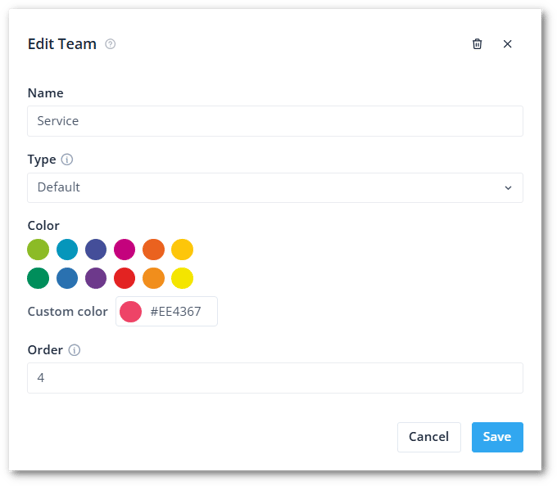
Name: Name of the team
- Type: Select the type of team
- Default: The team is shown in the schedule and timesheet.
- Flexpool (Premium): Flexpool teams are used when employees need to be scheduled in another department but do not belong and should not appear in that schedule by default.
Employees who are assigned to a flexpool do not appear on the schedule, unless they are scheduled. Employees who are placed in a Flexpool, must belong to at least 1 default or hidden team. - Hidden (Premium): Hidden teams are useful for managers and owners, for example, they will not appear in the schedule and timesheet. The team is not shown in the schedule and the timesheet, but it is shown in the list of employees.
- Colour: Here you can pick a colour of the team
- Custom Color: Here you can use the colour picker on the right to decide on a customized colour or type in the Hex Code of the colour.
-
Order: The order in which you'd like the team to be displayed in your schedule
💡Tip: To place employees in teams and give them permissions, you can learn how to here.
Deleting Organisation Levels
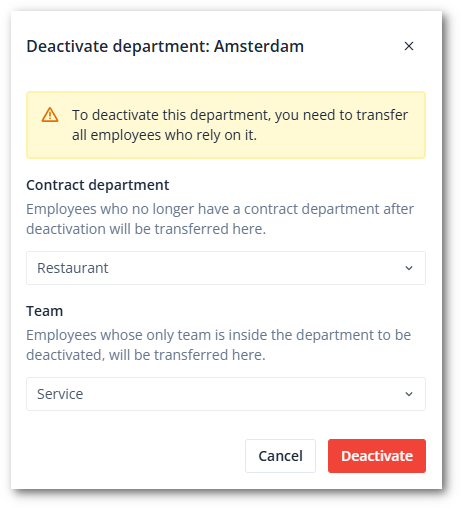
Organisation levels cannot be deleted, but are deactivated instead.
Clicking on the Trash behind the name of a location or department will deactivate the location or department. Before deactivating, you must move your employees to another department and team. Clicking the Trash icon will give you the option to move all employees to a team in bulk.
Once an organisation layer is deactivated, they are out of sight. To view and reactivate them, click on Show inactive items on the header. Deactivated items are now shown in red and can be reactivated by pressing the checkmark-button.
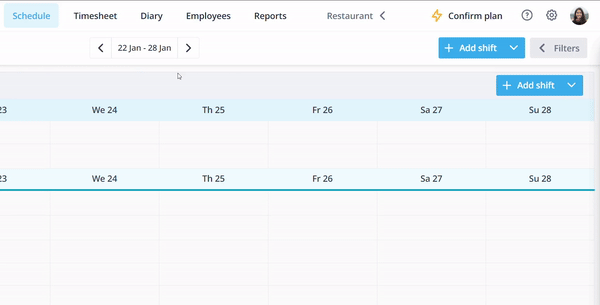
Switching Between Locations & Departments
After creating a location or department, you can switch between the departments in the top right corner or check all departments to show everything in order.