
Within Shiftbase, it is possible to create multiple shift types. You can think of services like a shift or evening shift, but also of an order picking shift for warehouses or running in restaurants.
For each of the points below, you have the option to navigate via the Tab Schedule or the Settings. We will explain both ways.
Contents
Creating standard shifts
In the Schedule:
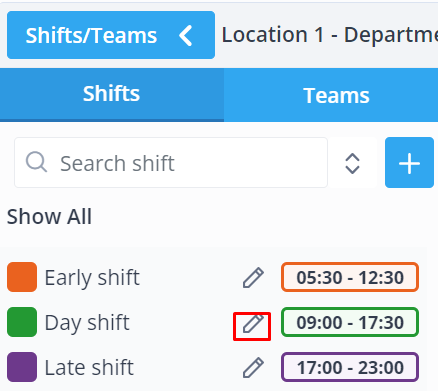
In the Schedule tab, click on the white top left button Shifts/Teams, here you will see the menu with all the standard shifts. Click on the + button to create a new standard shift.

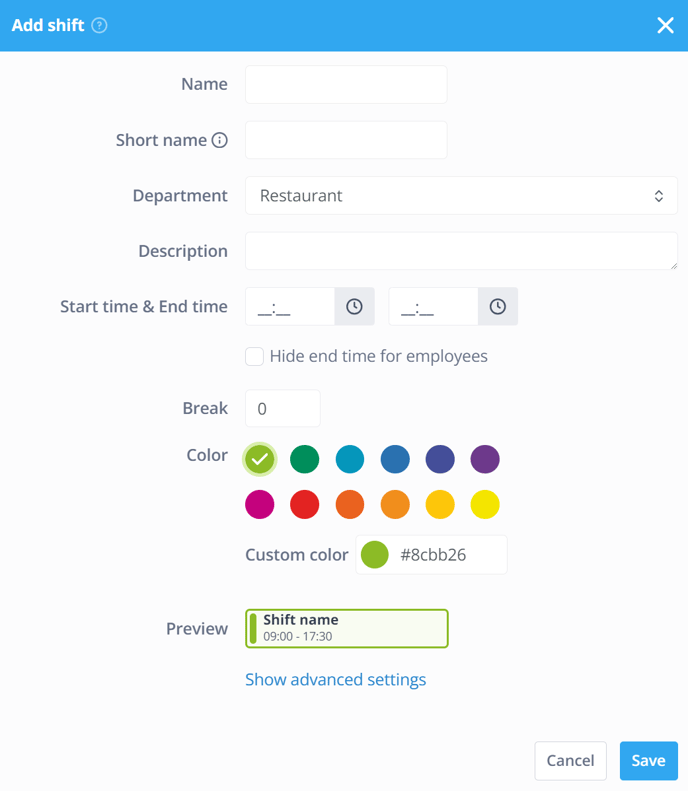
You will arrive at the screen below. Fill in the required information to create the standard shift.
-
Name: The name of the standard shift.
-
Short name: The name that is visible in the team schedule and monthly schedule.
-
Description: A description of the shift.
-
Start time & End time: The working hours of the shift.
-
Hide end time for employees: If you check this box, employees cannot see the end time of their shifts, this can be useful if employees have to work until close.
-
Break: Duration of a break in minutes.
-
Color: Color of the shift in the schedule.
- Custom Color: Here, you can pick the custom color if you want and put in color via Hex Code.
Show advanced settings
-
Skills: Optionally select the required skills for the new standard shift here. This option is only visible if you have already set up skills.
-
Ratecard: Optionally select a different Ratecard from the one in the employee's Contract type here.
-
Order: Order of the standard shifts in the menu on the left.
-
Task: When a shift is marked as a task, the hours will not be shown in the schedule and the time registration.
Once you have saved the new standard shift, it will be in the menu on the left. Standard shifts can be easily dragged into the schedule from here to be planned.
In the Settings:
You can also create a shift template in the Shifts menu in Settings. The Filter for departments on the top right gives you faster access to other departments.

You just click +Create Shift and then the same screen will open where you can create your shift template.

Editing standard shifts
In the Schedule:
An existing standard shift can be changed in the Shifts/Teams menu by moving the cursor of your mouse over the shift's name and clicking on the Pencil icon.
❗Caution: Time settings in the shift will not be retroactively incorporated into the schedule. Only the colour and name are retroactively incorporated into the schedule.
In the Settings:
When you are in the settings, you can customize the default Shift by clicking on the pencil to the right of it.

Deleting standard shifts
In the Schedule:
An existing standard shift can be deleted by moving your mouse cursor over its name and clicking on the Pencil icon. Next, you will see a red button with a Trash can in the lower-left corner. Click this to delete the shift.
In the Settings:
If you want to delete a template in Settings, just click on the Trash can to the right of the Shift.
⚠️ Warning: If you delete the shift template, all shifts already assigned from this template will remain in the schedule.
