Managing absence
In this article you can find out how to manage employee absences.

Requesting absence can be done by employees in different ways. They can request it via the website or in the Mobile app.
By default, an employee can only request vacation, other absence types must be registered by an administrator.
💡 Tip: Use an absence restrictions if no employee absence is desired in a certain period.
Content
Registering absences
Over Schedule tab:
In the Schedule, on the right side, click on :Actions. In this menu, choose Add Absence.

Over Employee tab:
To register an absence over the employee menu, go to Employees>select an employee>go to Absence and add a new absence using + Add absence.

Over Timesheet tab:
To register an absence over the Timesheet menu, go to Timesheet>click :Actions>Add Absence

Approve or reject absences
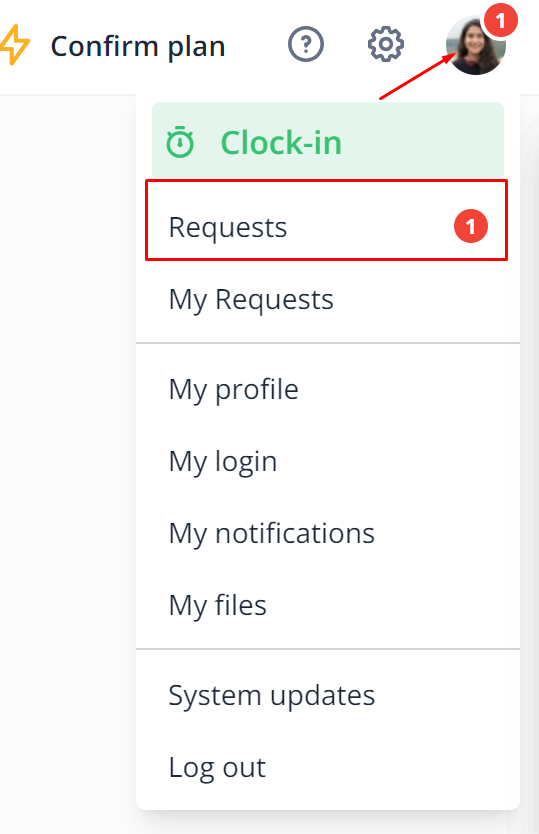
When an absence request is made by an employee, you can approve or reject it. To do this, click on your icon in the top right of the bar and go to Requests.

Here you will see the list of absence requests if you click on the request.

💡Tip: If you want to view the request in the schedule, you can click on the blue date on the right of the request.
You can view the request, modify it if necessary and Approve or Reject it.

If you're trying to decline an already approved absence, you can simply navigate to the Employee tab and click on the employee. Then go to Absence and open the absence over the pencil symbol.

Now click on the Trashcan

Absence form explained
If you add an absence over one of the ways explained above, the following form will open

- Employee: Select which employee you want to register absence for.
- Type: Select the absence type you want to register.
- Unknown end date: This checkbox will show up if you've allowed this absence type to have open end dates. It is especially helpful when registering sick leave or parental leave.
- Period: The desired Period of absence. In the table you will find an overview of all Days within this period.
- Per day the number of absent hours can be entered, by default this is already entered from the contract. If you want to deviate from this, enter the correct number of hours.
- For a part of the day check Partial day and set the from time and number of hours manually from the time that the absence started.
If you have your absences in days it the form will show these fields instead:
- Absence: This option let's you choose the different types of a day off
- Full day: Deductes a full day of vacation
- Half day from: Deductes half a day from the point in time you choose
- Half day until: Deductes half a day until the point in time you choose
- No absence: Will not deduct a day of absence
- Note: Gives you the opportunity to add a description.
- Approval: Here you can approve the request directly, provided you have the correct access rights for this.
- Intermediate shifts: Here you can choose what to do with the shifts that are cancelled due to the absence.
-
Remove from schedule: You remove the shifts that are scheduled in the period of absence.
-
Leave in schedule: This will leave the already scheduled shifts with the selected employee.
-
Move to open shift: Allows you to convert the already scheduled shifts to open shifts
-
- Hide absentee days without hours: If you check this, absence days without absence hours will not be shown in the schedule and timesheet.
Registering National holidays
To ensure that employees are not charged for minus hours on National holidays, you can register them in Shiftbase. To do this, add a new absence and, under Type, simply select National holiday.

By default, leave hours from National holidays are not deducted from the leave balance.
💡 Tip: You can also register a national holiday for several employees at once via a bulk action, you can read more about it here.
⚠️ Warning: Because contracts can change during the year, we recommend that you do not register the national holiday until you have created the schedule for that period.
-1.png?width=180&height=60&name=shiftbase-text-logo-transparent-dark%20(3)-1.png)
