Step 1: Setting up your AFAS Online integration with Shiftbase

In Shiftbase, it is possible to create an integration with AFAS Online that allows data to be exchanged without manual intervention.
What can this integration do for you? Read more here
For succesfully setting up the integration I divided this article in four seperate steps.
-
Step 1: Configuring AFAS
Content:
Generating an AFAS Online token
Configuring AFAS
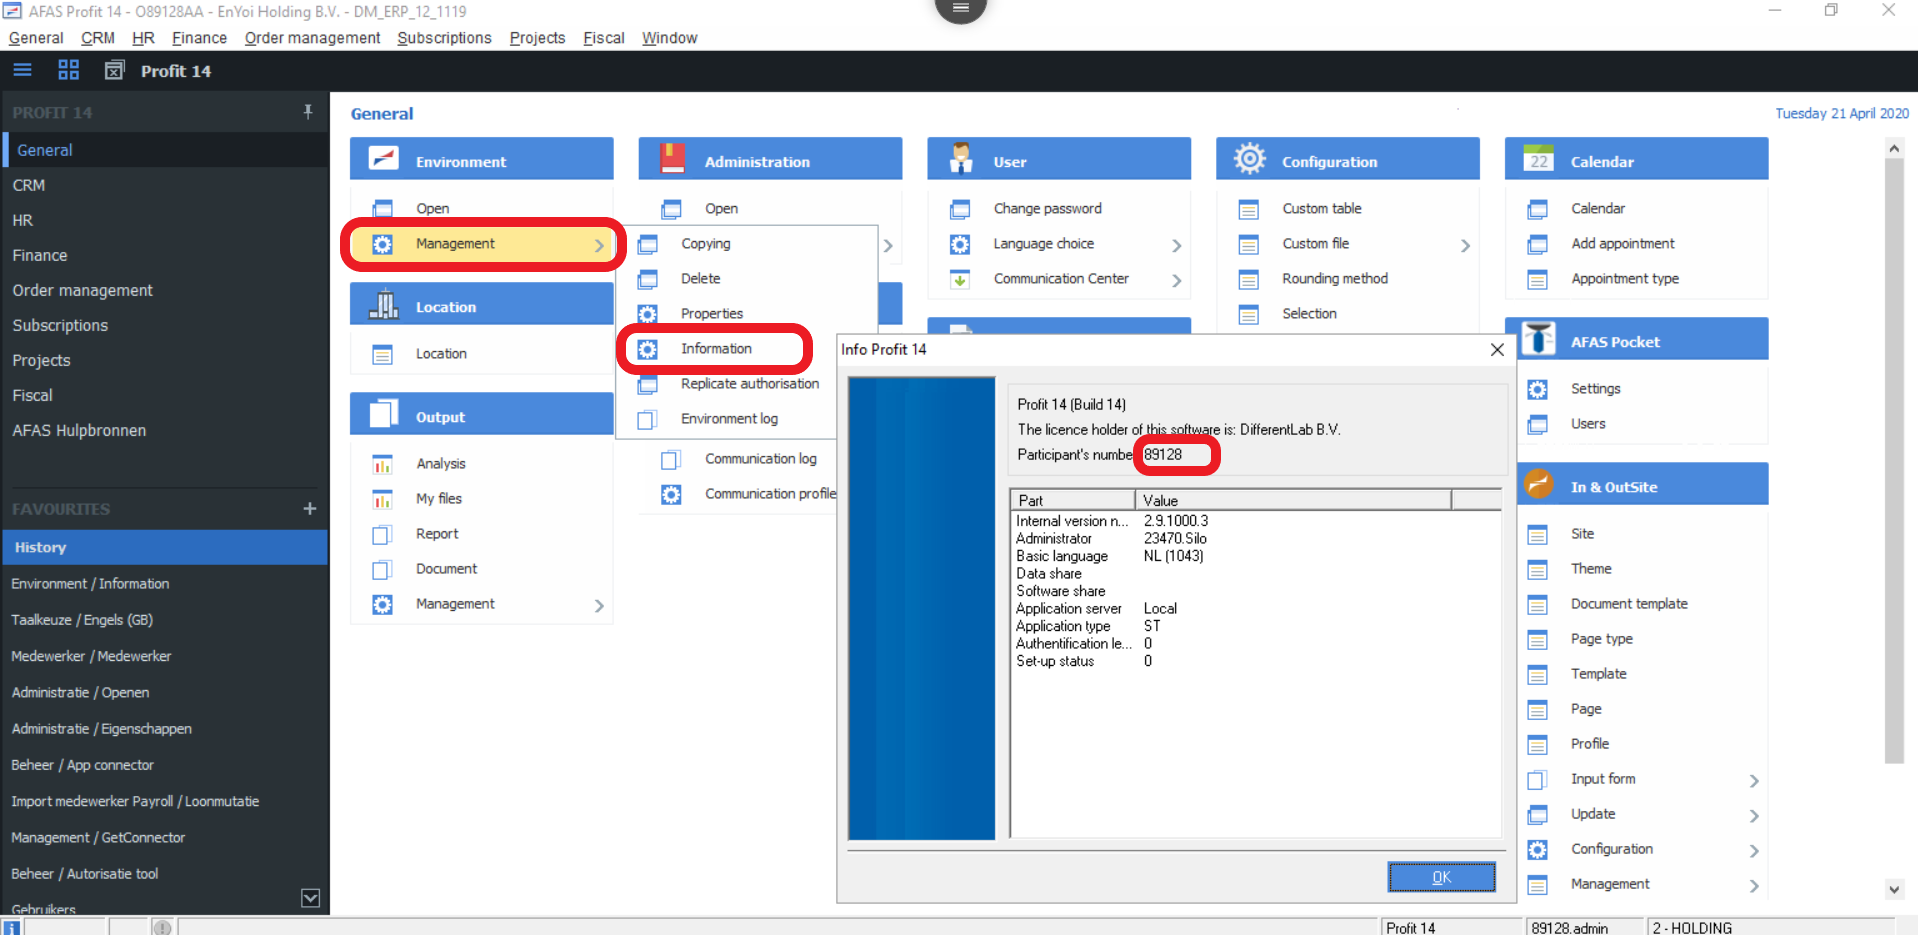
Let's start with your Environment ID. This can be found in your AFAS Online account via General > Management > Information.
Here you'll see Participant's number: this is your Enviroment ID.
Generating an AFAS Online token
First within AFAS you add the App connector. This is needed so that Shiftbase can make the connection with your AFAS account. Follow the following steps to generate a token in AFAS.
-
Create a GetConnector
-
Admin a GetConnector
Creating a GetConnector
The first step is to import the different GetConnectors we need to create the right permissions so we can read out the right data.
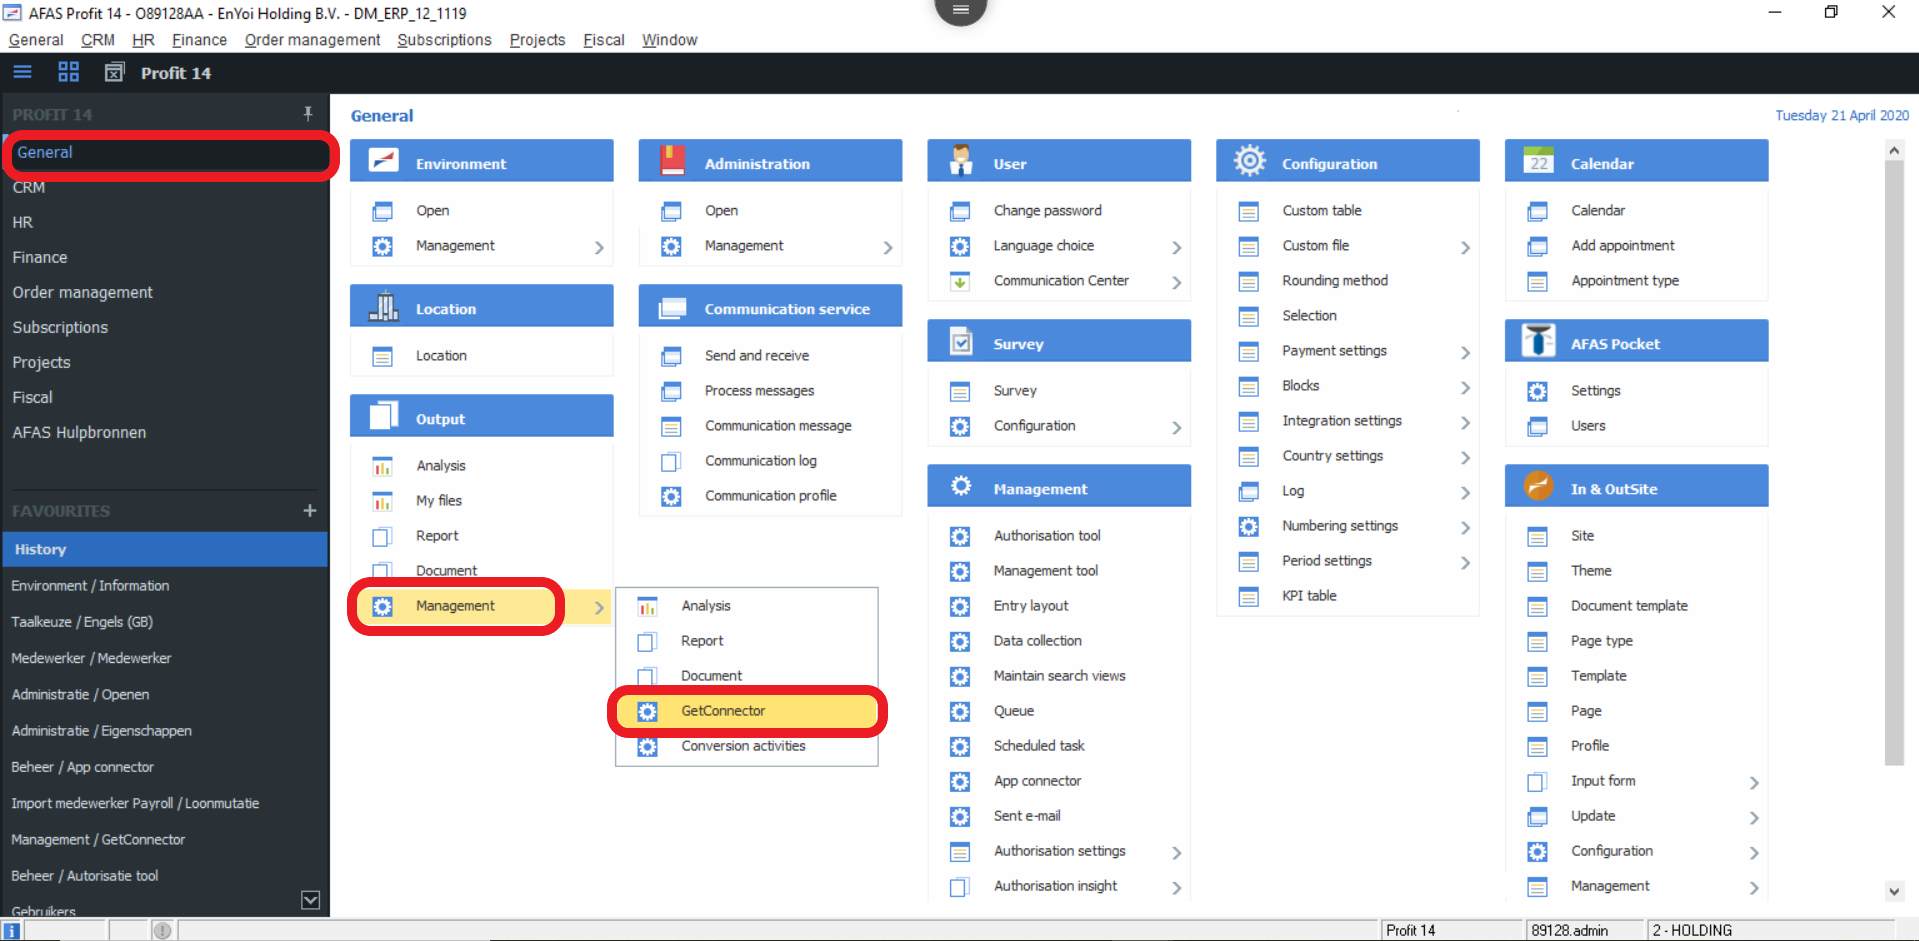
Head towards General > Output > Management > GetConnector.
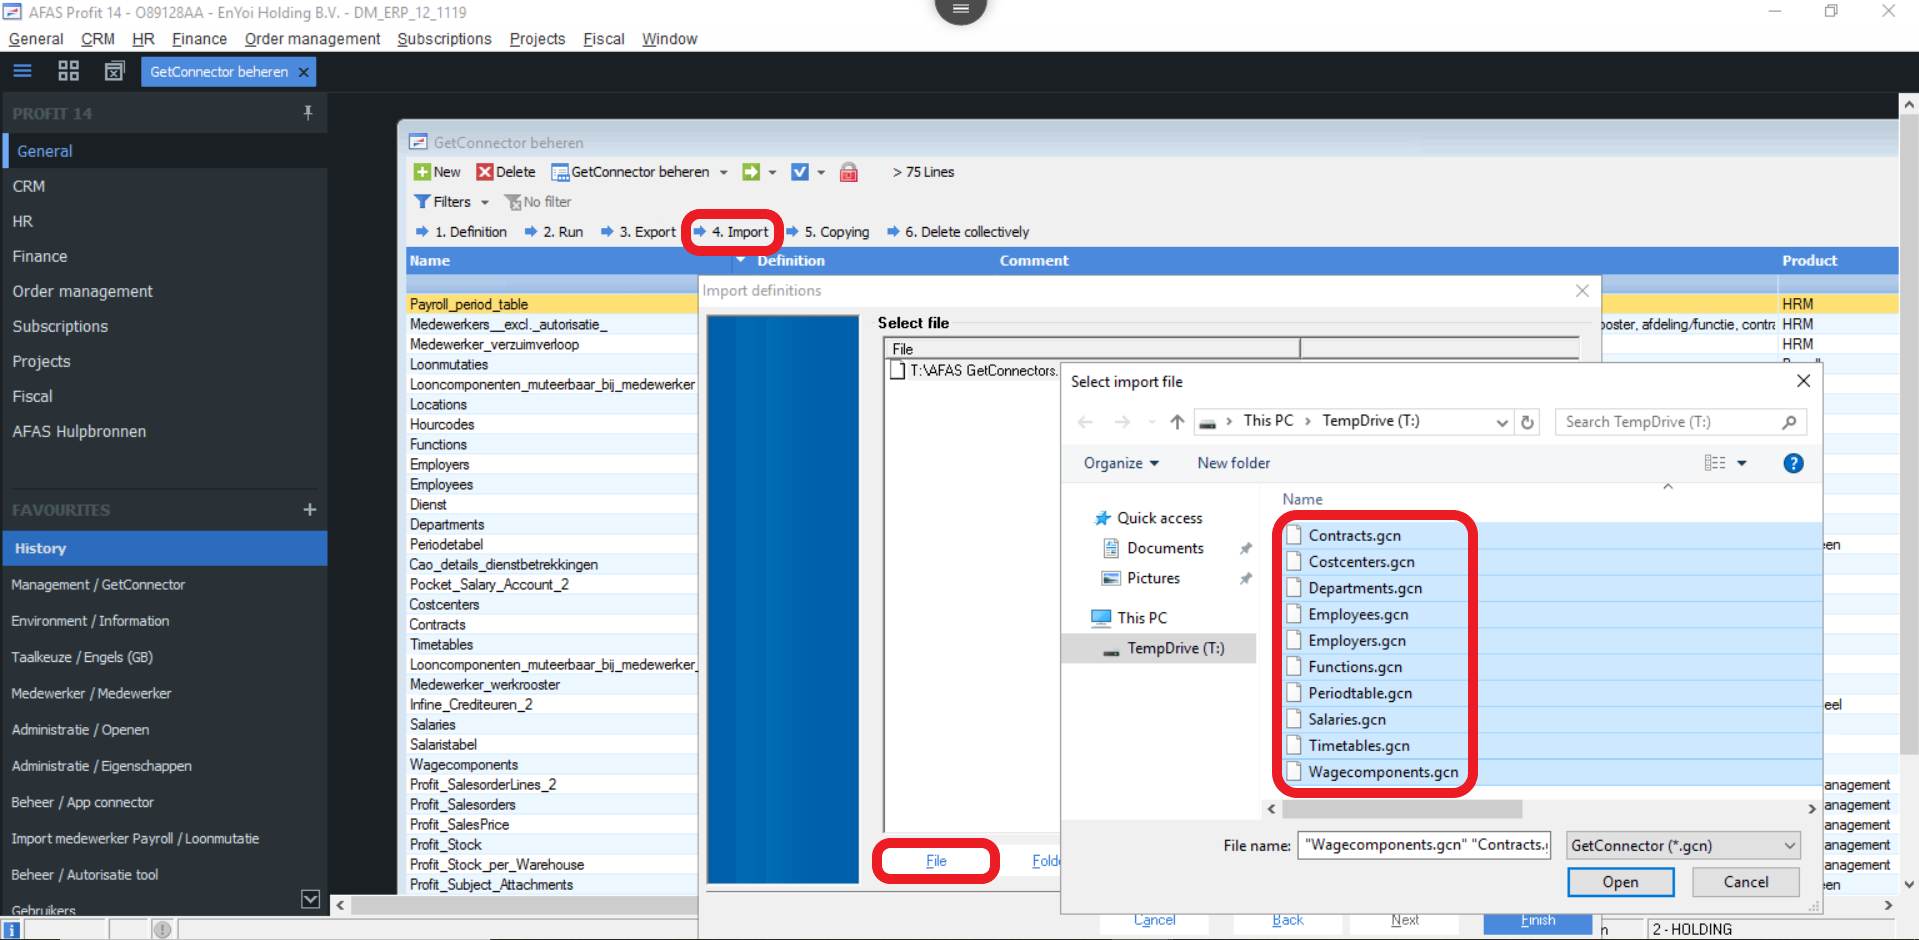
Here you can download the zipfile with the GetConnectors that we already created for you. This you'll need to upload to your AFAS account. On the top of the page you can find the button to do so.

Next click on Import and choose File, now select all the GetConnectors and click on Open followed by Finish. Now that all the GetConnectors are available these can be added to a User group.
Managing the GetConnector
The second step is to group all the different GetConnectors together into a User group. This way the various permissions will be bundled together.
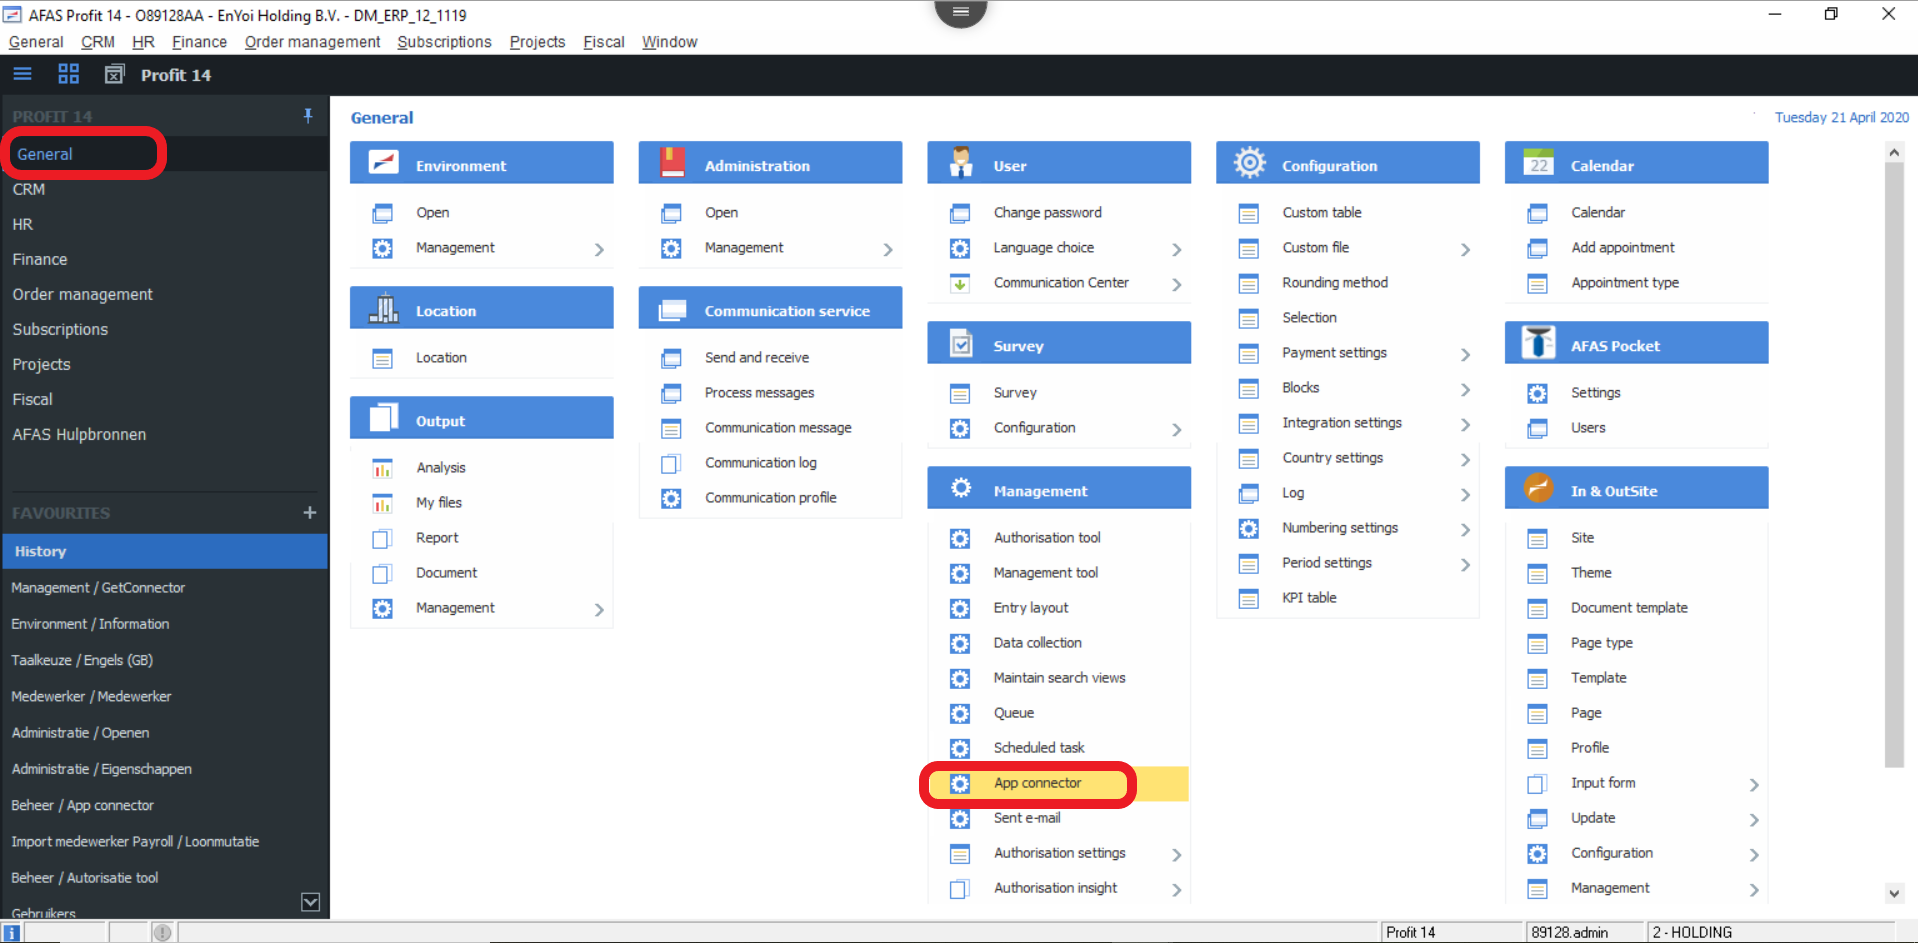
Head towards: General > App connector.
In the overview you can then choose for + New. Here you can add a Description (for instance: Shiftbase) and you can indicate the User group via ... and select Everyone followed by clicking on OK and Finish.
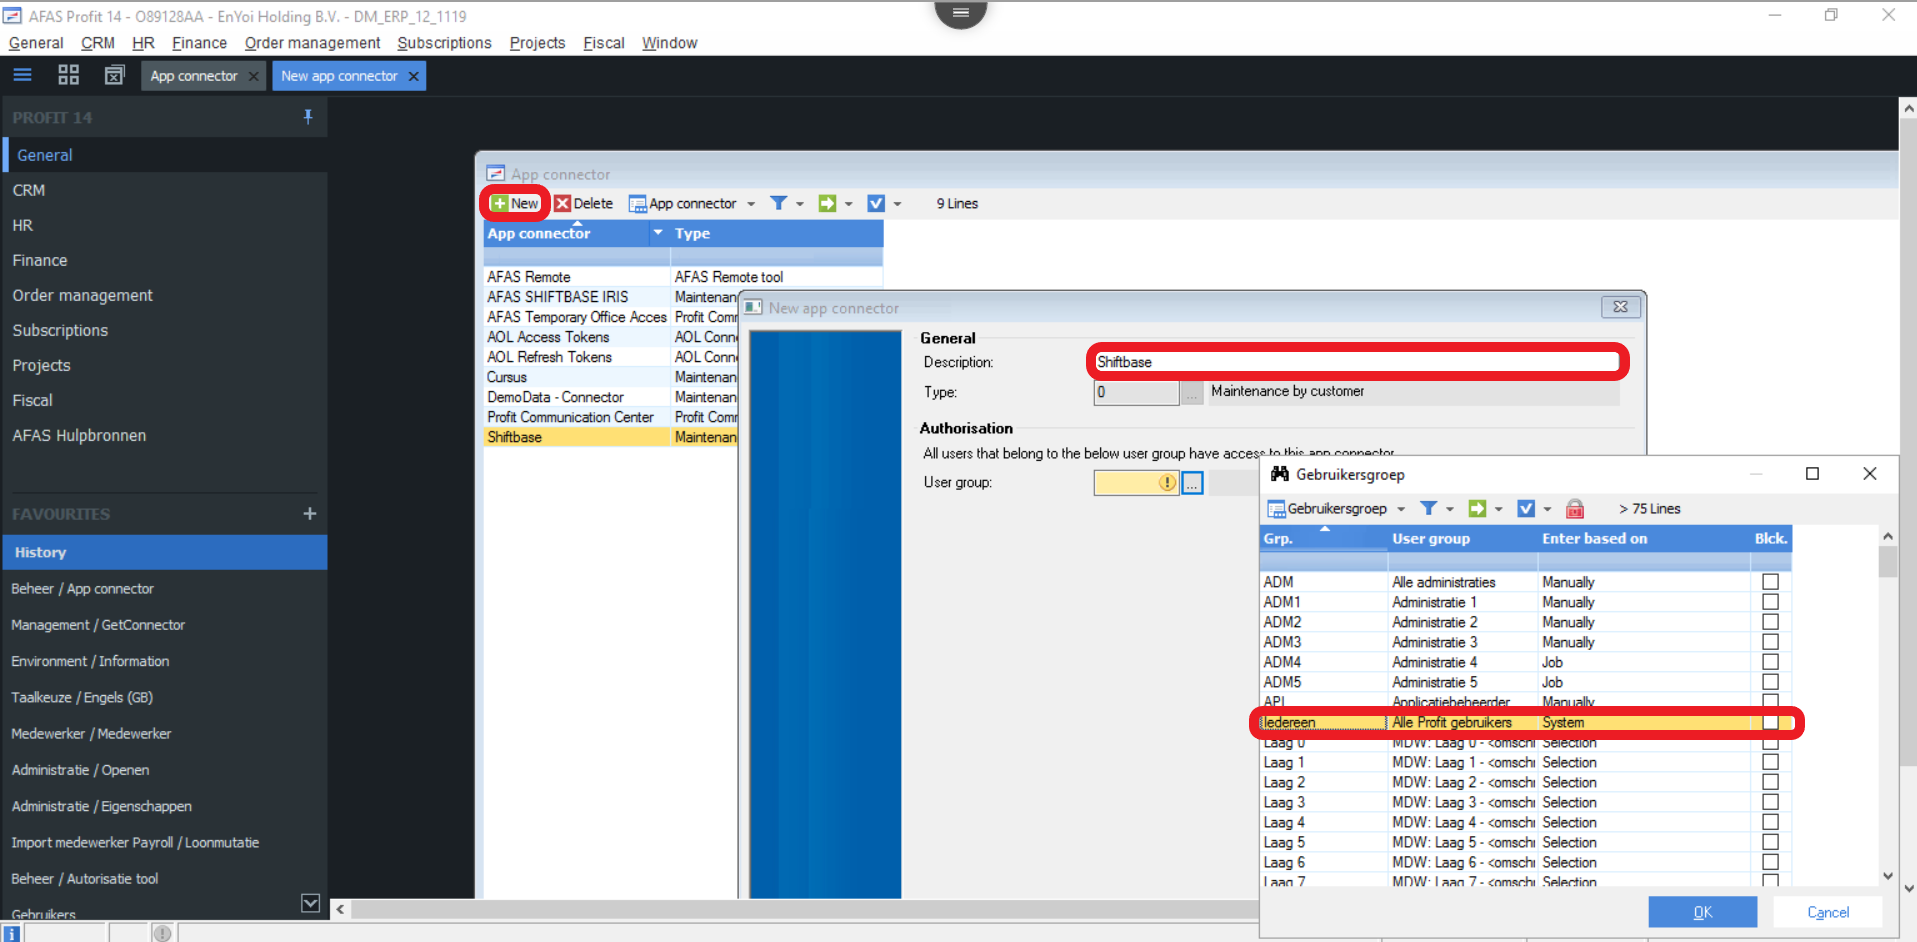
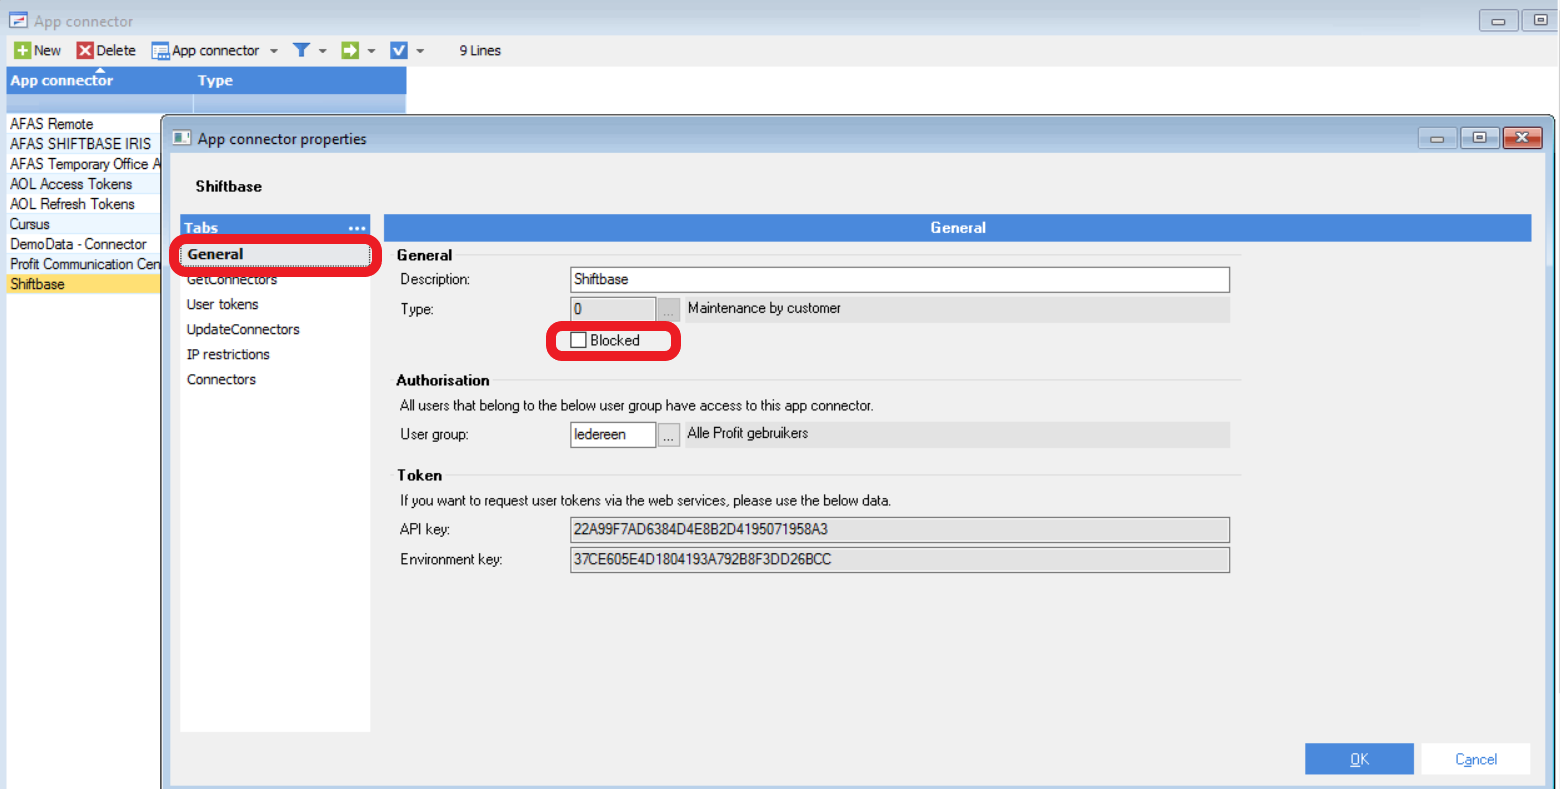
In the General tab you need to uncheck Blocked.
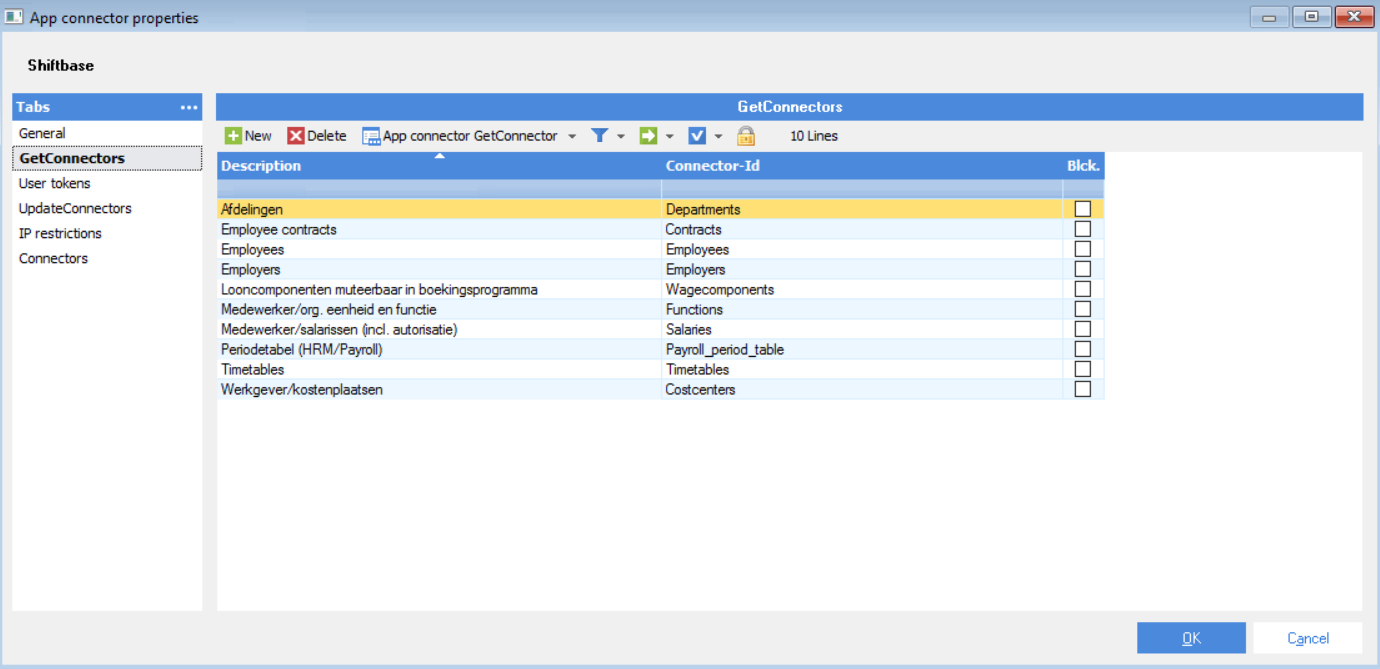
Next on the left, click on the tab GetConnectors and click on + New. Click on Sort ascending to easily find and select the following connectors.
Definition Connector Id
-
Emplyee contracts Contracts
-
Werkgever/kostenplaatsen Costcenters
-
Afdelingen Departments
-
Employees Employees
-
Employres Employers
-
Medewerker/org. eenheid en functie Functions
-
Periodetabel (HRM/Payroll) Periodtable
-
Medewerker/salarissen (incl. autorisatie) Salaries
-
Timetables Timetables
-
Looncomponenten muteerbaar in boek Wagecomponents
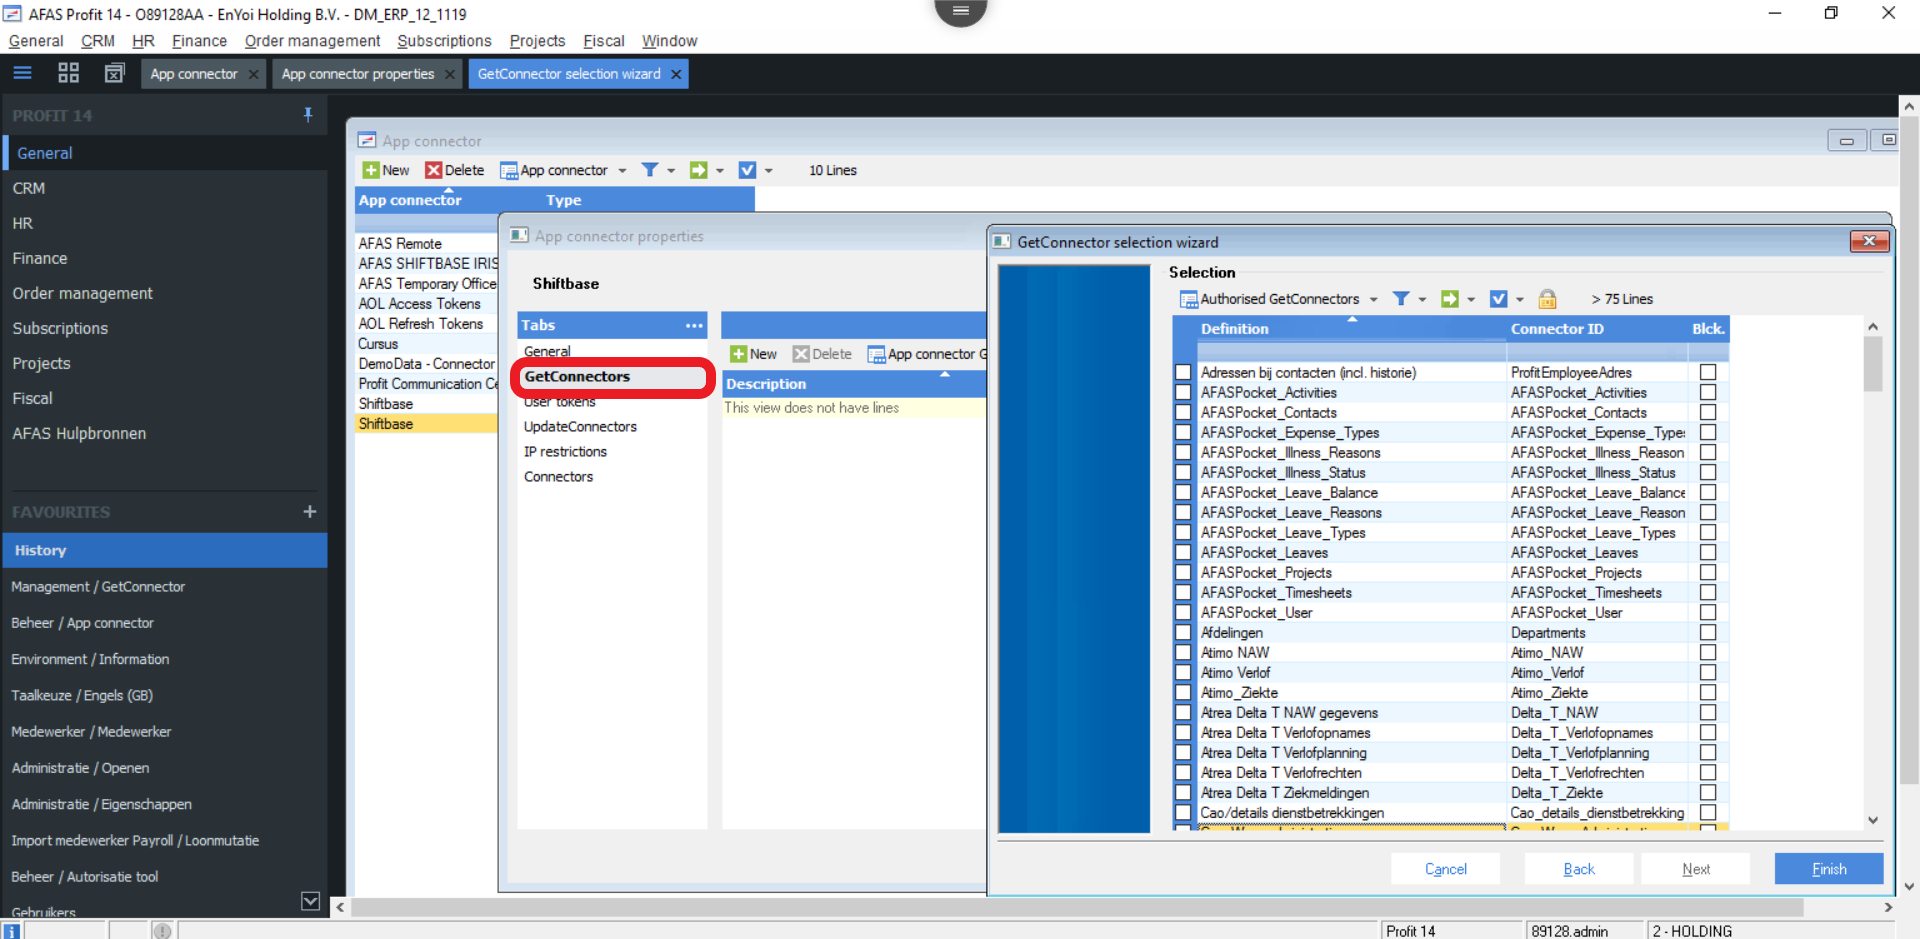
There should be 10 GetConnectors selected, after doing so click on Finish and OK.
Reopen the newly made Shiftbase App connector.
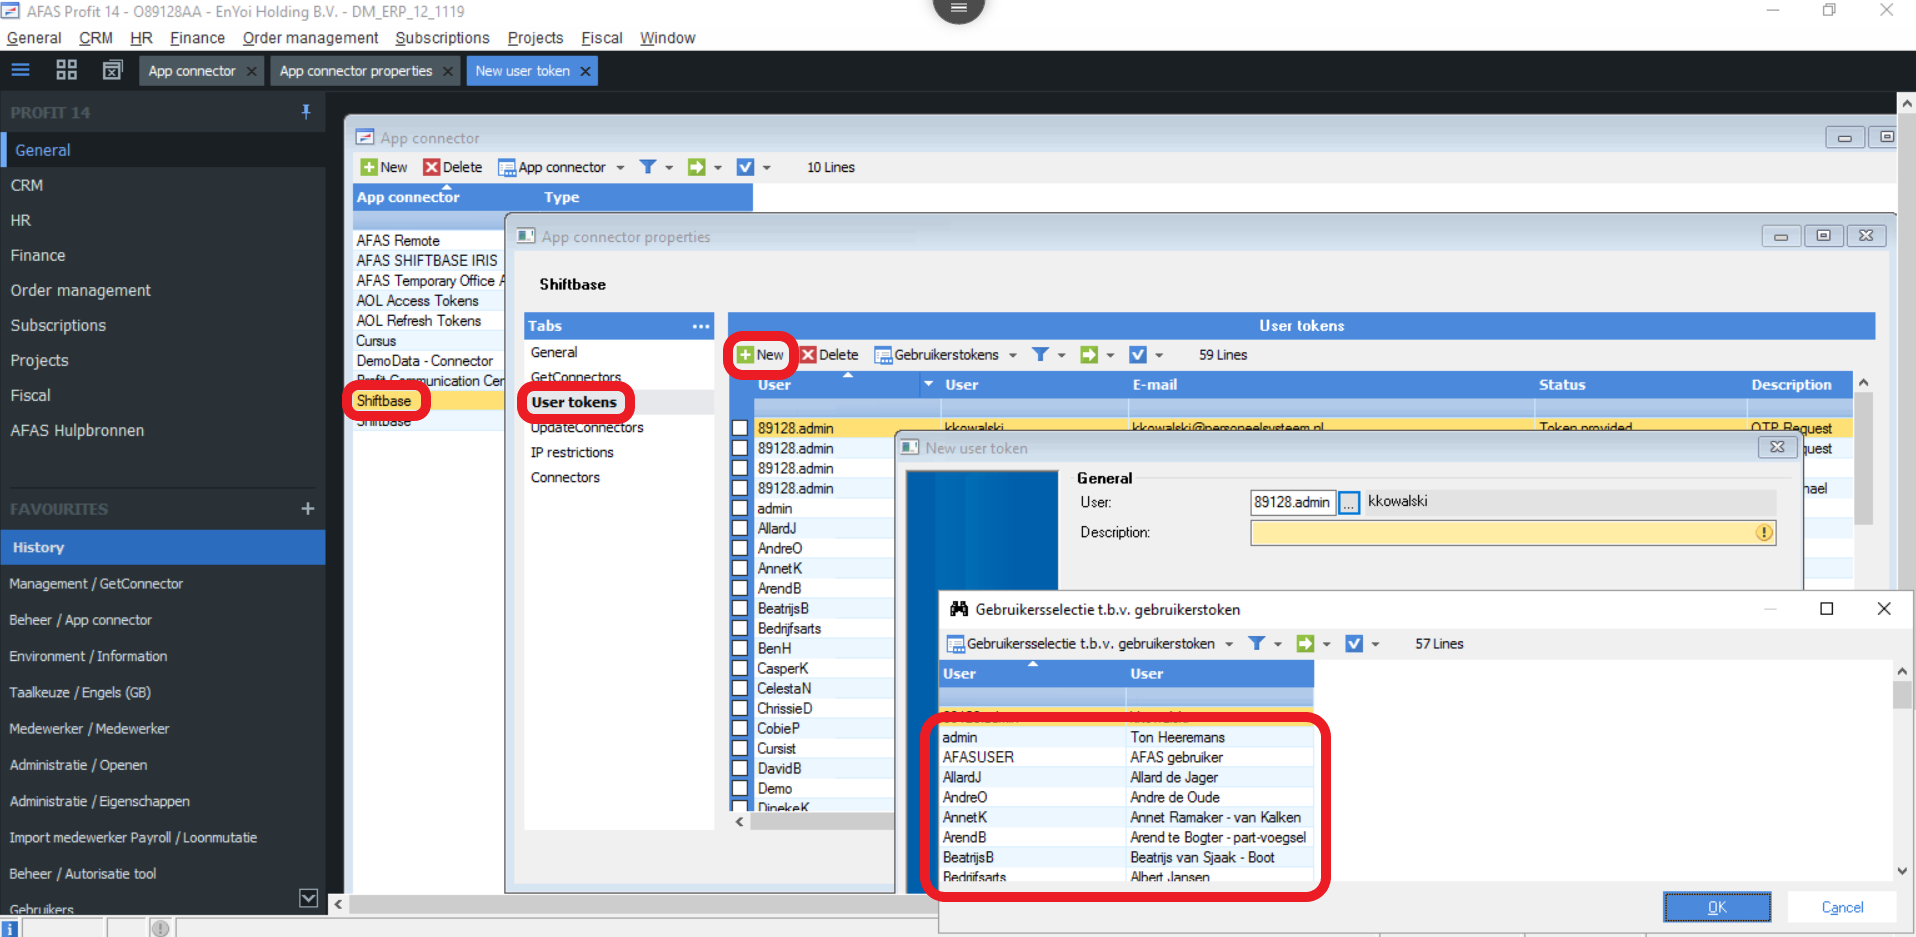
On the left click on the tab User tokens.
Click on + New to select a user via ... and add a Description (For instance: Shiftbase integration) and click on Next.
You now have a Generated token visible that you can use to make the connection possible between Shiftbase and AFAS Online!
Copy the token.
On top of the screen via the clipboard icon you can easily copy the token.
Pay attention! The entire token needs to be copied!
Next click on Finish and OK.

After the aforementioned steps to create the Environment ID and Token these now need to be configurated. Configuring the integration with AFAS is done in several steps that we will highlight seperately.
