
With Shiftbase, you can have employees clock their worked hours. By letting employees clock their own worked hours, you always have an accurate start and end time of their shifts. Also, employees can switch between Shifts (Premium).
In this article will give you an overview from start to finish to set up clocking in Shiftbase. We will look at permissions, optimal settings and clocking rules. This guide is relevant for clocking hours with the Mobile app and with a Kiosk. You can also use one of the integrations to clock worked hours.
Content
View clocked hours in the timesheet
Permissions
To ensure that employees can register their worked hours themselves, you need to give employees the appropriate permissions to do so.
Navigate in Shiftbase to Settings > Security > Permissions. Here, you have an overview of all permissions regarding clocking under the folder Timesheets.
- Clock time: The user can clock themselves and other employees in and out via Desktop.
- Clock own time: The user can clock their own time via desktop.
- Clock own time with mobile: The user can clock their own hours via de mobile app.
- Edit clocked time: The user can edit all clocked times during and after working times, within the team/department they have permissions.
- Edit own clocked time: The user can edit their own clocked time during and after working times.
- Allow clocking in from any location: The user can clock in outside of any clocking boundaries setup.
- Allow clocking out from any location: The user can clock out outside of any clocking boundaries setup.

Settings
Before getting started, it is highly recommended to disable the setting Copy schedule to timesheet. This functionality pre-fills the Timesheet according to the scheduled hours. Because clocking will be used, we don't need this prefill because it will create overlapping timesheets.
Also have a look at the Time interval. This interval will be used for rounding rules.
Navigate in Shiftbase to Settings > Timesheet > General to set these up.

Department variations
If you require one department to clock their hours and the other not, you can use Department variations in the Settings. Variations allow you to customise settings to a specific department. If all departments need to clock their hours, there's no need to create a variation. Read on how to set these up in this article.
💡 Tip: If you create a department variation in the Settings, make sure to do so on Timesheet > General and Timesheet > Clocking.
Clocking in via desktop
Employees can clock themselves in by logging into Shiftbase and then clicking on their icon at the top right. In the menu that appears, the employee can click on the Clock-in button at the top.

Then the team and the shift can be selected.
Should any clock restrictions (IP address or Geolocation) apply, these are also checked for the employee. When all this is done, the employee can Clock in by clicking the Clock in button at the bottom right.

📝 Note: If there is a schedule, the Team and Shift will prefill accordingly to clock in quicker.
To Clock-out again at the end of the shift, the employee can repeat the same steps. Where in the menu first the Clock in button could be found, this has been changed into the red Clock-out button.

By clicking Clock-out a screen opens where the data of the worked shift can be checked and a note can be added. The employee can finally clock-out by clicking on the Clock out button in the bottom right corner.
-
Team: The employee was clocked in on this team. They can change it if they actually worked for another team.
-
Shift: The employee was clocked in on this shift. They can change it if they actually worked another shift.
-
Meals: The employee can insert how many meals were taken during the shift. To enable or disable this, navigate to the Timesheet settings.
-
Mileage: The employee can insert how many kms have been travelled for this shift. To enable or disable this, navigate to the Timesheet settings.
-
Note: The employee can leave a note. This note will be visible for the planners in the Timesheet.
-
Custom fields (Premium): If Custom fields are applied to the timesheet, they will appear here to be filled in.

Switch shift (Premium)
If you have several shifts on one day, it is possible to switch directly to the next shift during your clocked shift. This may apply, for example, if your morning shift is at location A and your afternoon shift is at location B.
If you are clocked in on your current shift, you can switch shifts as followed. Click on your icon in the top right-hand corner. Here you can click on Switch shift.
- Department: If the employee belongs to a team in a different department, this option will show. Here you can select the department you want to Clock in next.
- Team: Here you can select the team you want to Clock in on.
- Shift: Here you can select the shift you want to Clock in on.

When everything has been filled in, click on Switch to this shift. Now you are off the clock on your first shift and on to your next with just one click.
📝 Note: Employees cannot switch shift to a Flex pool.
Clocking by manager
From time to time, employees forget to check in. It is possible for managers to clock-in employees and set a clock in time if the employee was originally on time.
To do this go to the Timesheet menu and make sure to select Team view on the top left. Here, you can use the arrow on the right in the button + Add worked hours, choose the option Clock employee.

In the screen that opens, select the Employee, Team, Shift and optionally the Clock in time you want to record. If you don't enter a Clock in time, the current time will be used. Next, click the Clock-in in the bottom right corner to actually clock-in the employee.

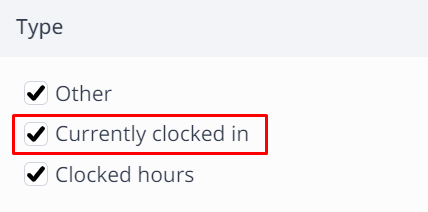
To clock-out employees as a manager, go to the Timesheet tab. To display all clocked in employees, you must have the appropriate filters selected. To do this, click on the grey Filters button at the top right of the screen, here you select Currently clocked in.
Whenever employees are clocked in, you will see a red Clock out button. Click this to clock-out the employee.

View clocked hours in the Timesheet
To view the exact clocking times, you can hold your mouse on the Stopwatch icon. The following details will be displayed.
- Clocked in / Clocked out: The exact timestamps the employees have clocked. The timestamps might differ from what is entered into the timesheet due to rounding rules.
- Break: If a break was clocked, it will display here exactly how much time was in between the clock-out and clock-in. Make sure the Split clocked shifts setting is higher than the intended break duration to view break duration.
- Via: Displays the clocking method such as Web app (desktop), Mobile app, Kiosk or via Integration.

💡 Tip: Please note that live tracking of employees is not allowed. GPS data is only recorded at the moment of clocking in or out (if location tracking is enabled and permissions are granted).
