
In Shiftbase, it is possible to create an integration with Personio that allows data to be exchanged without manual intervention.
What can this integration do for you? Read more here.
Contents
Possible error messages and solutions
Requirements
The Client ID and Client secret can be retrieved from your Personio account. They are linked to the created API token within Personio. The minimum required permissions of the API within Personio are:
- Employees (Read)
- Attendances (Read + Write)
- Absence (Read + Write)
- Attributes: ''Occupation type''
⚠️ Warning: Do not send your Client ID/secret via the e-mail or chat.
You can share the Client ID/secret with us over our Password Pusher.
Only add the Client ID/secret in the designated area at the integration. The Client ID/secret is like a password to privacy sensitive data.
Adding the integration
To add a Personio integration in your Shiftbase account head towards Settings > App center > Personio. Then click on the + Add Personio integration.

Then you can log in with your Client ID and Client secret.
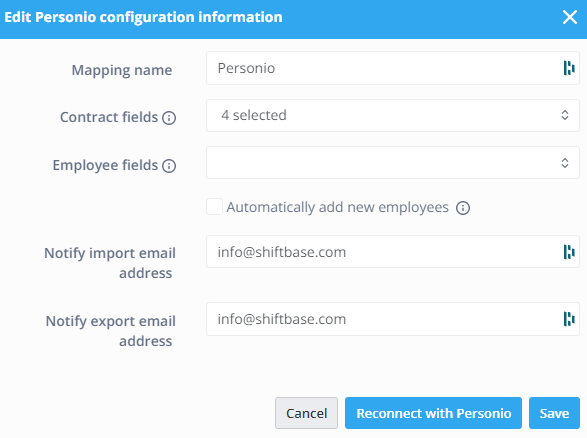
Once the Client ID and Client secret have been entered, the configuration screen appears.
Here you give the integration a name. Under Contract fields you can specify which contract fields you want to synchronise. Here you have the following options:
- Function
- Enddates
- Contract hours
- Wages
Under Employee fields, you can indicate which employee fields you wish to synchronise. Here you have the option to add a date of birth.
By ticking the Automatically add new employees box, new staff from Personio will also be added to Shiftbase during the nightly synchronisation.
Next is the field Notify import email address. The email address you enter here will receive email notifications when a change is transferred from Personio to Shiftbase.
And lastly the field Notify export email address. The email address to which information about a Personio export will be sent. Finally click on Save.
Mapping the integration
Next you will see the settings for the integration. Here you will find the following 3 tabs:
- Contract departments
- Contract types
- Employees
- Absence types
Contract departments
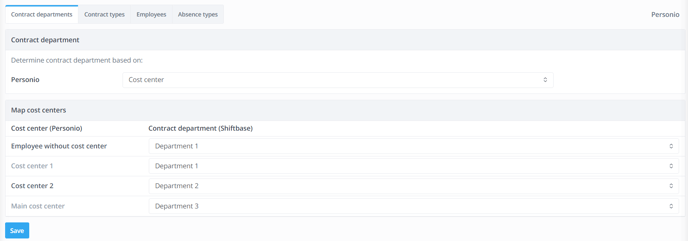
Depending on the setting for determining the contract department of the employees, you must map all cost centers/departments from Personio to a team in Shiftbase. It is also possible to indicate that employees working in certain cost centers/departments should not be imported.
❗ Caution: When updating the contract department mapping to another team, and rerunning the import, teams and permissions will stay the same. Only the contract department will change with this action.
Contract types
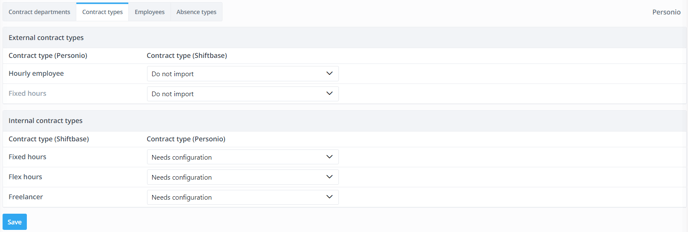
Next you can go to the second tab Contract types. Here you link the contract types from Personio and Shiftbase. First you have the External contract types. Here you link the contract types as known in Personio with the contract types within Shiftbase.
👀 Example:
Hourly employee links to Flex hours.
Fixed hours links to Fixed hours.
Next you have the Internal contract types. Here you link the contract types as known in Shiftbase with the contract types within Personio.
👀 Example:
Flex hours links to Hourly employee.
Fixed hours links to Fixed hours.
When you have linked the contract types, click on Save at the bottom.
Employees
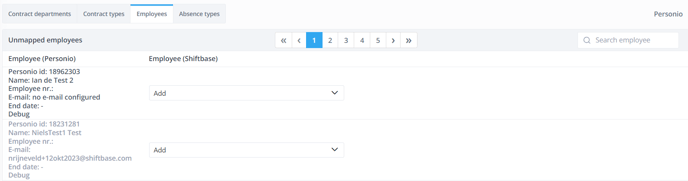
Next, it is important to link all employees that need to be linked to your account from Personio. We automatically try for every (active) employee to find a matching employee within your account.
If no match can be found, the employee is automatically set to add. The match is made based on email address and/or SSN. You can find your Personio employees in 4 categories:
- Unmapped employees: The employees that are not yet linked and can be added.
- Mapped employees: The employees that are already linked to an employee within your account.
- Excluded employees: Employees for whom it has been indicated/detected that they should not be imported, this can be done manually for a specific employee but also automatically using the settings for contract departments/contract types.
- Inactive employees: All employees who are already out of employment, by default this group is hidden. You can show these employees with the black button on the right.
When the employees are linked, click on Save at the bottom.
Once everything has been processed, a synchronisation will take place every night. Here, linked employees are updated and new employees are added, if desired.
Absence types
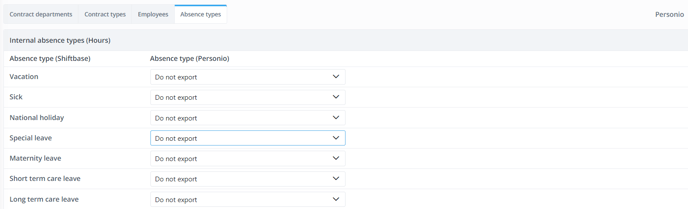
If you would like to have your absence and leave requests of your employees synchronised automatically from Shiftbase into Personio as well, you will need to map this in Absence types tab. The synchronisation takes place right away, as soon as a change was made to the absence or leave request of the employee.
Here you can select if an absence type should be exported and if so to which absence type in Personio.
Report
There is also a specific report for Personio. This report offers a concise timesheet overview per worked shift per employee. This report can be transferred directly to Personio.
The following fields are shown in this report:
- User id
- Name
- Break
- Date
- Start time
- End time
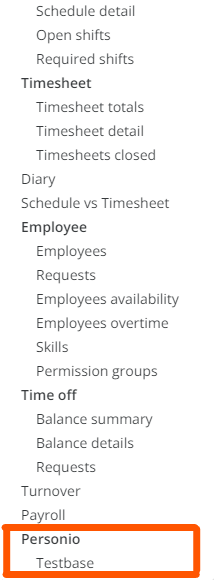
This report can be found via the Reports tab. Here you can find the reports by clicking on Report dashboard. Here you select the Personio report at the bottom.
Then you can select the period in the top left-hand corner. After selecting the period, you can request the report in the top right-hand corner.
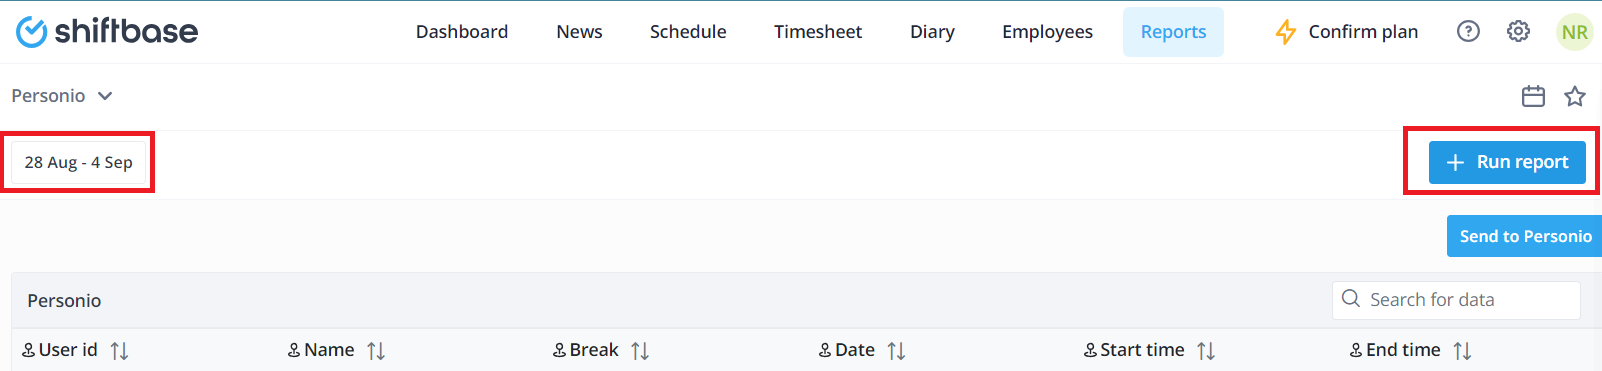
When you have requested the report, you will see a sample version. Then you can click on Send to Personio in the top right corner.

The data is transferred directly to Personio.
⚠️ Warning: It is now possible to overwrite a previously exported period in Personio. To be able to do this, you must enable the permission right "Attendance: Read" in Personio. In Personio, navigate to Settings (left bar), then click on API credentials:
Click on the line with the Shiftbase integration you wish to edit. In the next screen, select:
- Employees (Read)
- Attendances (Read + Write)
- Absence (Read + Write)
- Compensation (Read)

If you'd additionally like Personios occupation types mapped to Shiftbase contract types, don't forget to select Occupation type under attributes.

Finally, scroll down to click Save at the bottom of the page.
Possible error messages and solutions
When requesting reports, an error may possibly occur. The following possible error messages are known to us, including solutions to avoid these errors.
- Overlapping absence request: Remove one of the absence requests in Personio, reopen the other absence request, and save it again.
-
Time-off type not found: Add the matching time-off type and/or map it correctly on the mapping page (configuration in Shiftbase).
-
Employee not found: Check if the employee has been mapped correctly (in Shiftbase).
-
Your API token lacks one or more permissions that our integration needs: Activate the correct permission in the Integrations tab - API reference of Personio.
Active app overview

If you want to make changes at a later date, you can do so by going to Settings > App center > Personio.
In the active app overview you can see 4 symbols. These are as follows:
- Gearwheel: This opens the configuration window.
- Squared arrows: This leads to the mapping of the integration.
- Recycle bin icon: This deactivates the integration.
- Download icon: This triggers the synchronisation process that normally happens at night.
