Calendar synchronisation
In this article you can find out how to synchronize your scheduled shifts with your calendar.

It is possible to have the schedule, events and absences in Shiftbase automatically synchronized with your personal calendar. This feature will generate an .iCal link, which you can add to your desired calendar app like Google Calendar, Outlook Calendar & Apple Calendar.
Content
Calendar synchronisation on desktop
Calendar synchronisation on iOS
Calendar synchronisation on Android
Calendar synchronisation
To do this, go to the Schedule tab and click the Arrow in the top right corner of the Add shift button. Then click on Calendar Sync.


Clicking on Add new calendar will take you to the next screen.
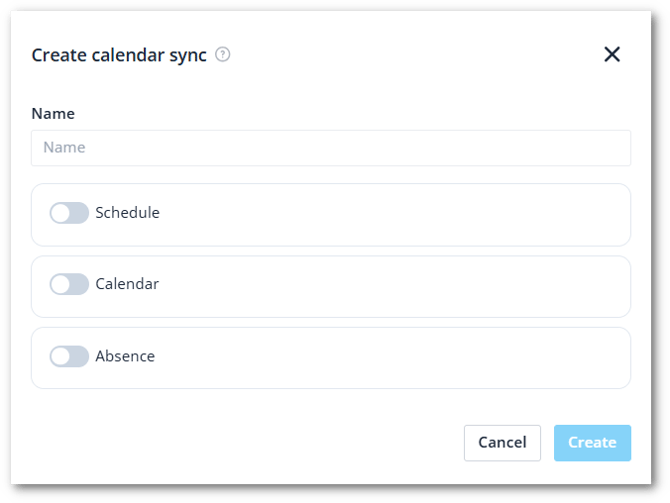
Enter the Name of the new calendar here, and select what you want to synchronize. You have the choice of:
-
Schedule
-
Scope: Here you can choose all schedules or just your own.
-
Departments: Which departments' schedule should be visible in the calendar.
-
-
Events
-
Departments: Which departments' events should be visible in the calendar.
-
-
Absence
-
Scope: Here you can choose all absences or only your own.
-
Departments: Which departments should become visible in the calendar.
-
Type: Which absence types should be visible in the calendar.
-
Status: Which absence statuses should be visible in the calendar.
-
Click Create to generate the unique link of the schedule.
⚠️ Warning: The file name must end in '.ics' for different calendars. For this reason, the link can also be converted to a .ics calendar link. You can do this by adding '.ics' after the link.
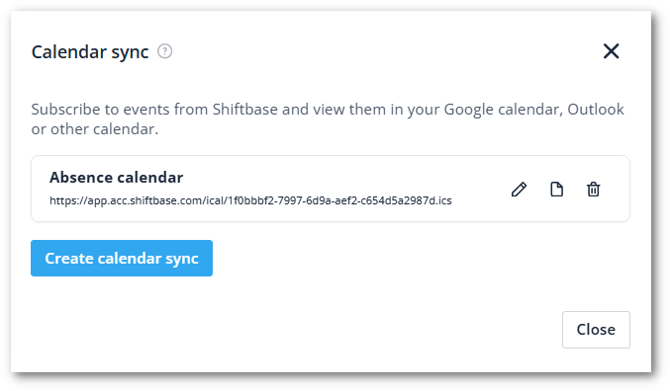
❗Caution: The calendar synchronisation retrieves the schedule from Shiftbase 10 weeks ahead into the future and 4 weeks back.
Calendar synchronisation on iOS
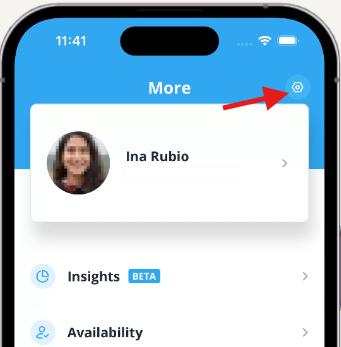
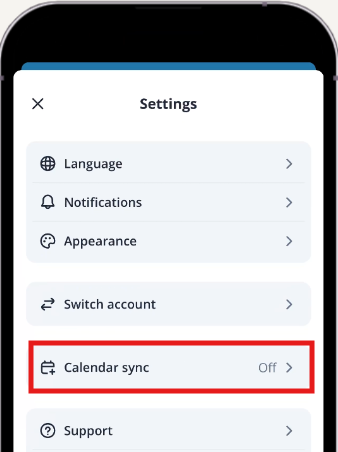
To add the Shiftbase calendar on Apple iOS, navigate in your Shiftbase app to More > Settings > Calendar sync. Here, you can enable the calendar synchronisation. You will be automatically directed to the Apple Agenda app.

When you are redirected to the Apple Agenda, hit subscribe to continue.

In the next screen, you can give a title to the Shiftbase calendar, give the Shiftbase items a colour and configure its notifications.

Calendar synchronisation on Android
To add the Shiftbase calendar on Android, navigate in your Shiftbase app to More > Settings > Calendar sync. Here, you can enable the calendar synchronisation.
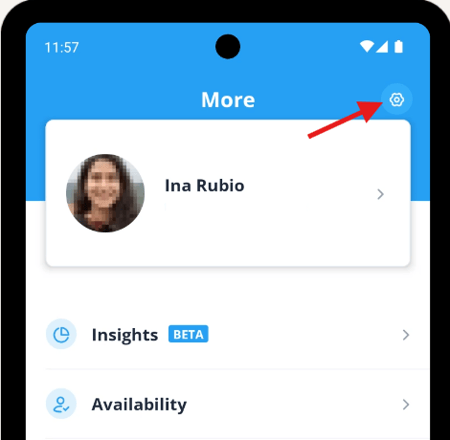
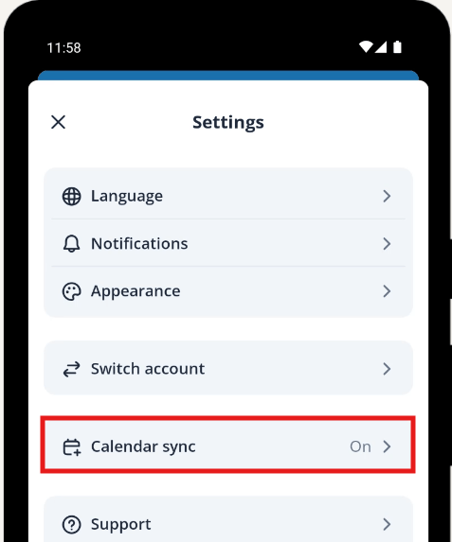
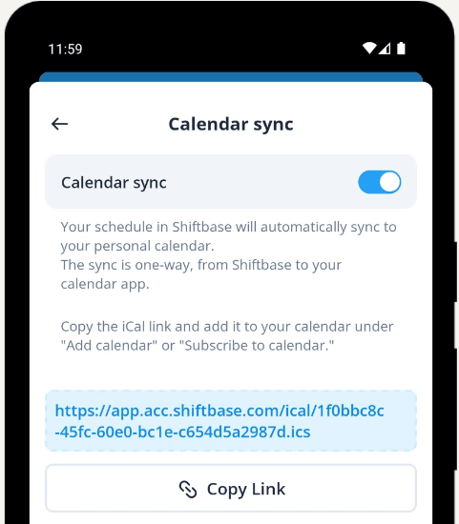
Enable Calendar sync on the top. Now, an iCal link is created.
Copy this iCal link and add it to your agenda of choice. If you need help finding where to add the link to your specific calendar app, you can check out their help center to learn how to proceed with the iCal link you've just copied.

-1.png?width=180&height=60&name=shiftbase-text-logo-transparent-dark%20(3)-1.png)