My hours
In this article you can find out how to gain insight into your worked hours.

In the Dashboard under Hours you can easily view your worked hours. In the upper right corner you can select the period in which you want to see your hours. Once you have done this, you will see an overview of all your hours registered.
My hours
You will immediately see how many shifts you have worked in the selected period, how many hours they were and if you have the rights, how much salary they represent.
⚠️ Attention: If hours worked have not yet been approved by your manager, they will not be included in the totals.
Adding worked hours
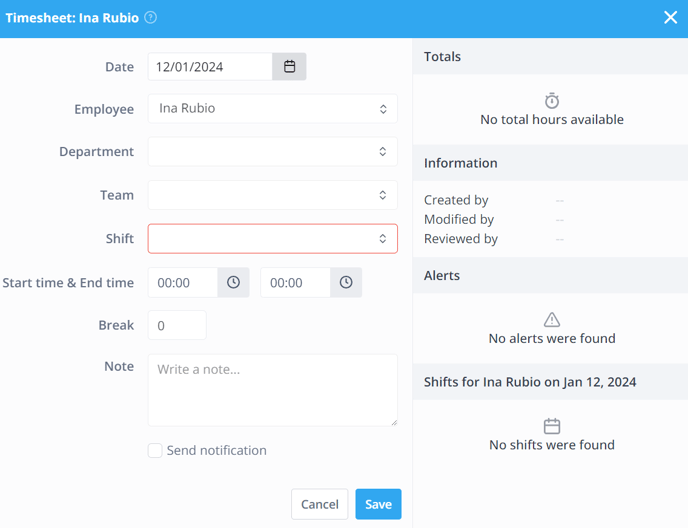
If you as an employee need to add your own hours worked, you can do this from the same overview. To do this, click on the button + Add worked hours on the right side of your screen. You will end up in the screen below.

-
Date: The date on which the shift took place.
-
Employee: The employees for whom the hours are to be recorded.
-
Department: The department in which the shift took place.
-
Team: The team in which the shift took place.
-
Shift: The desired type of shift.
-
Start time & End time: The worked hours for the shift.
-
Break: Duration of break in minutes.
-
Note: A possible description of the service or any details the person needs to know that approves your time.
💡Tip: As employee with a schedule, your Department, Team and Shift is already prefilled and doesn't have to be changed.
When you have filled in all the data correctly, click on the Save button.
Next, your supervisor can approve or reject the hours worked. You will see this back in the overview.
If you're an Admin, your hours will automatically be approved.

-1.png?width=180&height=60&name=shiftbase-text-logo-transparent-dark%20(3)-1.png)
