

In Shiftbase, you can create an integration with DATEV LODAS. With it, you export the worked hours and absences of your employees as a LODAS file (ASCII import file). You then import this file into DATEV LODAS, so you do not have to enter the hours manually.
You decide which departments are exported, link the employees to their personnel number in DATEV, and set for each hour component how it appears in the file. For this, you enter a key and a wage type.
💡 Note: LODAS counts every day with an absence code as a full day. Half days of vacation need to be corrected manually by the payroll department.
Contents:
Creating the DATEV integration
Configuring the DATEV integration
Creating the DATEV integration
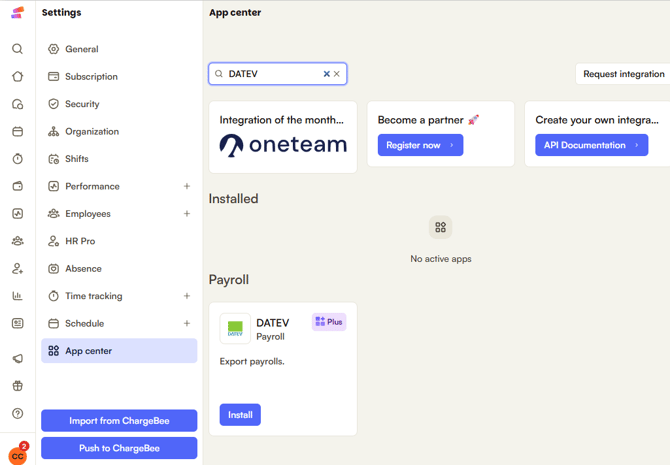
- Go to Settings > App center.
- Search for DATEV. You find the integration under Payroll.
- Click Install next to DATEV.
-
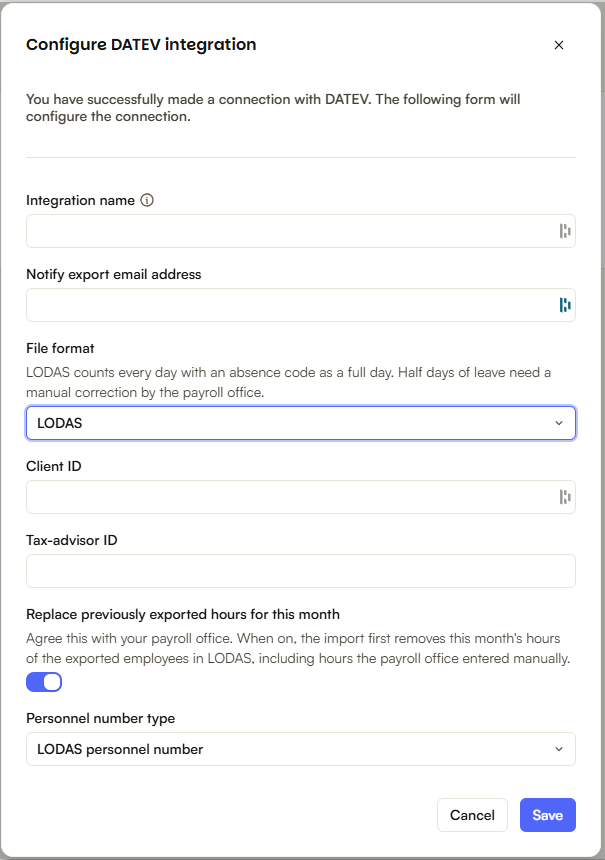
- Integration name: Choose a name for the integration, for example your company name.
- Email address for export notification: The email address the notification about the export is sent to.
- File format: Select LODAS.
- Client ID: Your client number in DATEV.
- Tax consultant ID: The consultant number of your tax consultant in DATEV.
- Replace previously exported hours for this month: Agree on this setting with your payroll department. When it is on, the import first removes the hours of this month for the exported employees in LODAS, including the hours that the payroll department entered manually.
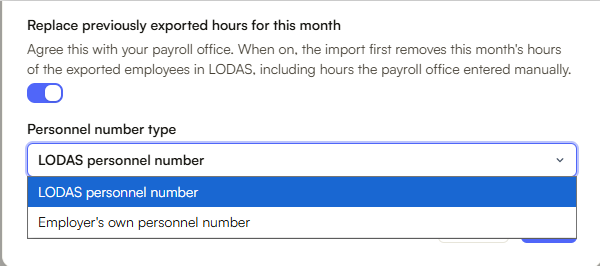
- Employee number type: Choose which personnel number you use for your employees. You can choose between LODAS personnel number and Employer's own personnel number.
5. Click Save.
Configuring the DATEV integration
After saving, you link the integration in three tabs: Cost centers, Export employees, and Hour components.
Cost centers
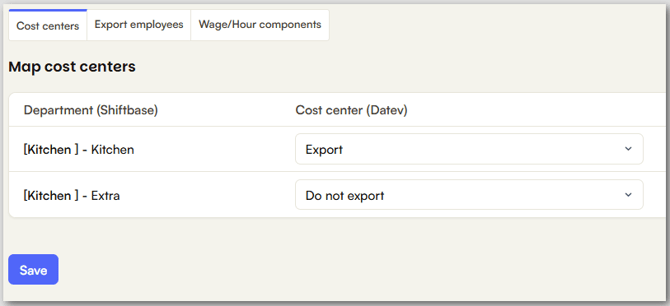
On the Cost centers tab, you see all departments from Shiftbase under Assign cost centers. For each department, select under Cost center (Datev) whether the hours are exported. You can choose between Export and Do not export. Click Save.
Export employees
On the Export employees tab, you link the employees. You see two lists: Unassigned employees and Assigned employees. For each employee, enter the personnel number that is used in DATEV under Employee (Datev). Use Search employee to quickly find a specific employee. Then click Save.
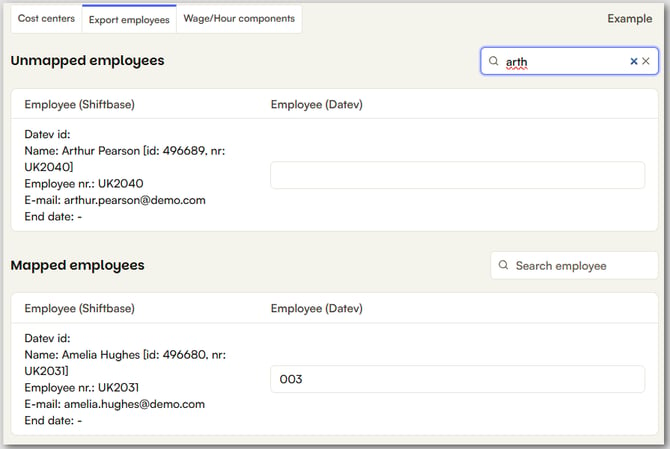
💡 Tip: The number you enter depends on your setting for Employee number type.
Hour components
On the Hour components tab, you set which hours are included in the file and how they are processed in DATEV. Use the absence codes from your payroll office for this (in LODAS: Extras | Ausfallschlüssel).
There are three tables:
- Hour components for fixed hours: For employees with fixed contract hours.
- Hour components for hourly wage: For employees who are paid per hour.
- Hour components Minimum + worked hours: For employees with a bandwidth contract, where the payment basis is Minimum + worked hours.
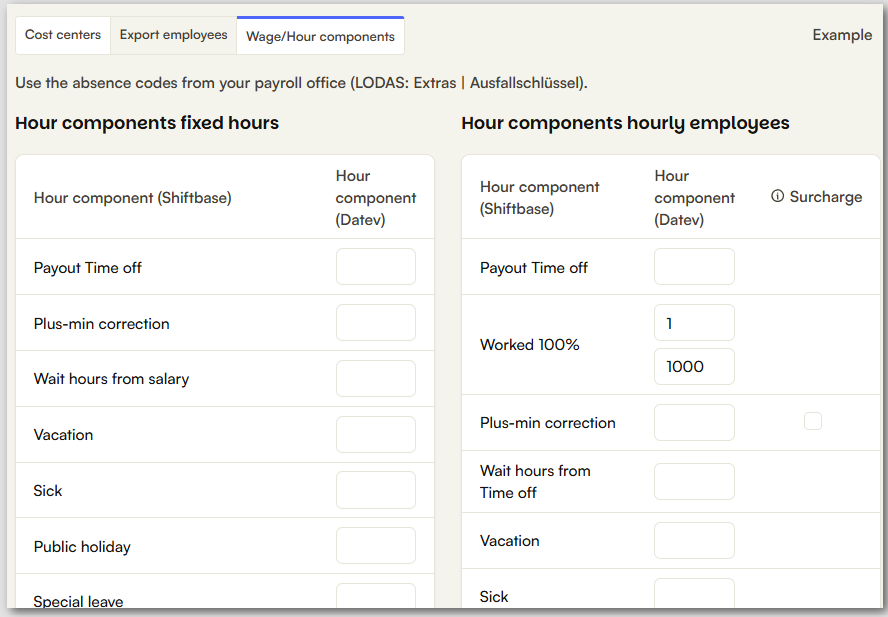
Key and wage type
For each hour component from Shiftbase (for example Worked 100%, Vacation, Sick, or Public holiday), you first enter a key. With the key, you state that this component is included in the export file. If you leave the field empty, the component is not exported. The key also determines which type of value arrives in LODAS, for example hours.
After that, a second field appears below. Enter the wage type there that the hours are booked on in LODAS.
You can find examples of keys in the DATEV documentation.
Exporting the file
After setting up, you find the export under Reports > DATEV. Use Filter to select the period you want to export the hours for, and click Show. You see all linked employees and their hours. When everything is correct, click Send to DATEV. The LODAS file is sent to the email address you entered in the integration.
Finally, import the file into DATEV LODAS.